The Buzz about Birchbox

I have to stay up to date on new products and industry buzz; one of the easiest (and most fun!) ways to do this is with a monthly Birchbox subscription.  Somewhere in the second week of the month a box of deluxe (and sometimes full size) samples are delivered to my door.  There are always products from major brands, but many are smaller companies that are just entering into the market so it's a great way to be "in the know" before the rest of the world is. There’s everything from make up to skin care to hair care and a few extra bonuses like tea, chocolate, nail polish and hair accessories.  Each box has a theme and the products are selected to complement it (ie back to school, spring break, the holidays, etc.). I’ve discovered there are times I try a product, love it and use the sample so quickly I have to order the full size product (like the SuperGoop City Sunscreen Serum – a skin care treatment, plus sunscreen.  Amazingly perfect for the summer!  Works great alone or under make up!).

If you want to know what’s new on the market or you just love beauty products, treat yourself to this monthly subscription ($10 a month and that includes the cost of shipping).  It's such a treat when you open your mailbox and the hot pink box is just waiting to be opened!!!

Birchbox
Birchbox

Have you tried Birchbox or any other monthly make up subscriptions?  If not, try this one and get ready to discover some great new products!

Jamie

"Cannot Live Without" Beauty Items

I'm constantly trying new products that claim to be the best and the greatest, but I've found over the years there are somethings I just continue to go back too.  Here are a few of my "cannot live without" beauty items.

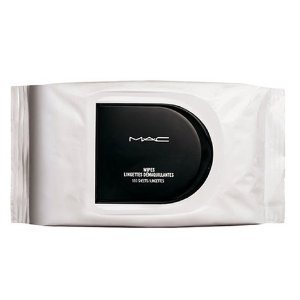
MAC Bulk Wipes

These are a lifesaver!  One wipe will remove every stitch of make up including mascara no matter how much make up I'm wearing.  It's EXTREMELY important you remove your make up before you wash your face.  Your face wash was never meant to do double duty by washing your face and trying to remove make up.  (A bonus with these wipes is if you're in a time crunch or just too exhausted they can be used as a one stop shop-removing make up and hydrating your skin.  Great for those nights when you just want to get to sleep!)

La Roche-Posay Toleraine Purifying Foaming Cream

I have been obsessed with this face wash for years!  As someone who has sensitive, dry skin I have to be cautious about what products I use and this one has never let me down.  This cleanser is so concentrated, just a small pea size amount is plenty to wash your face so the bottle seems to last forever, plus it has a nice rich lather and does not strip my skin of moisture. (La Roche-Posay in general has amazing products.  Check out one of my favorite sunscreens in this post)

Toleriane Purifying Foaming Cream

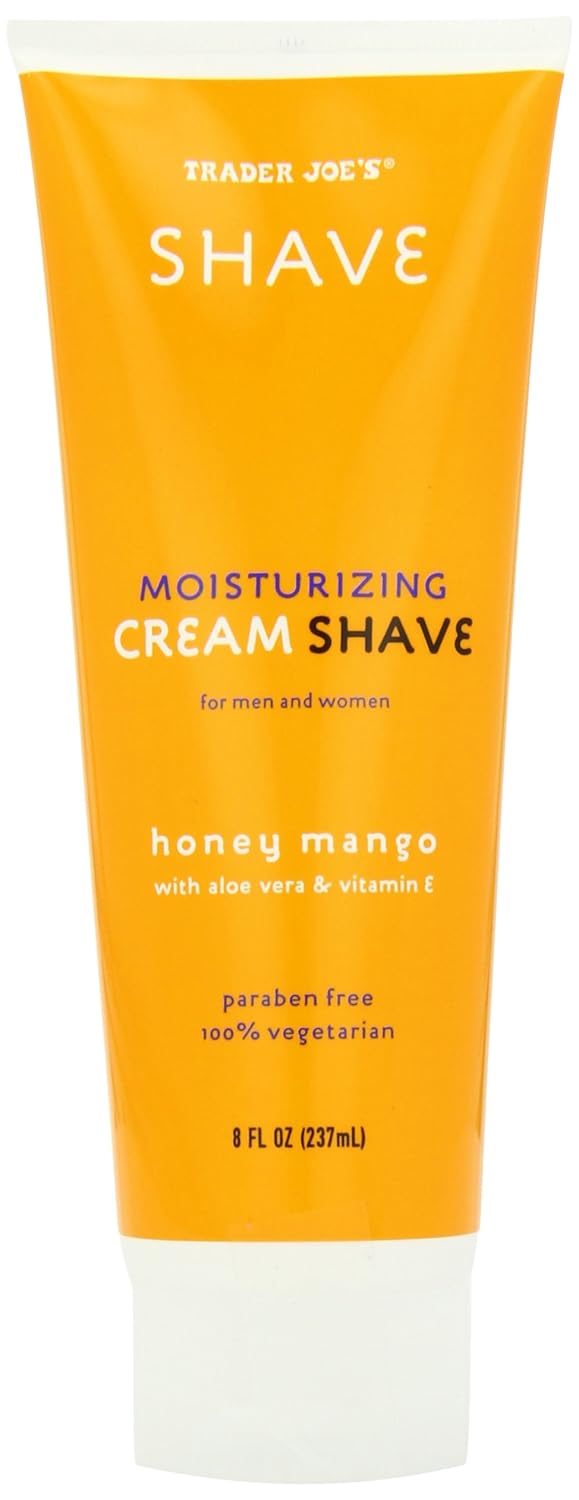
Trader Joe's Honey Mango Moisturizing Shave Cream

You know those shaving commercials...the ones where the girl's leg is completely covered in a foam shaving cream minus the one strip she's already shaved off?  For years that was me, shaving my legs like the girl in the commercial.  A non-foaming shaving cream just seemed so bizarre to me that I resisted trying anything else until one of my guy friends (yes, even guys get beauty too :) ) mentioned how the Trader Joe's Shaving Cream kept his face from breaking out after shaving.  From my first bottle I knew I was never going back.  As one who shaves my legs every day (I really hate prickly legs) this product is perfect for continual use on your legs...and all other delicate areas that need shaving.  A little goes along way with this product, so you need just enough to create a barrier between your skin and the razor.  Also, a bonus is that it's Paraben free and 100% Vegetarian. (For those who don't live near a Trader Joe's you can order it off of Amazon here.).  Get ready for silky, smooth legs!!!

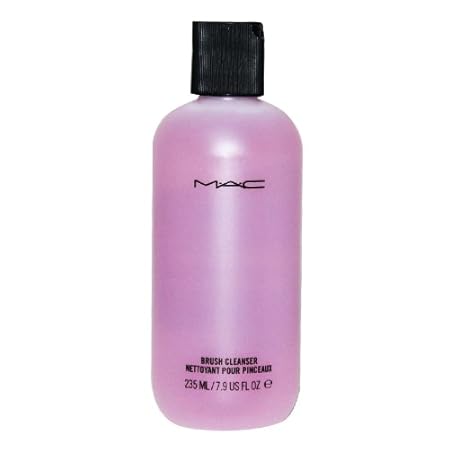
MAC Brush Cleanser

Oh, I cannot stress the importance of properly cleaning brushes!  Next to my hands they are the most important tool in my make up kit and that is why I use this both personally and professionally.  There are plenty of other brush cleansers on the market (and even some DIY Pinterest boards), but I DON'T suggest them.  For me this brush cleaner packs a triple punch-it cleans/shampoos, disinfects with an anti-bacterial agent and most importantly it conditions the bristles.  It's not as imperative with a synthetic brush that the bristles be conditioned, but it is with a natural bristled brush.  Just imagine washing your hair and never putting a conditioning agent on it; it might be clean, but it's probably not going to be the softest and silkiest it could be.  Trust me after you feel how soft the bristles are after you've washed your brushes, you won't go back to another brush cleaner.

 These are just a few of the beauty items I can't live without.  Let me know what are some of your "Can't Live Without" items!

Jamie

I Scream, You Scream, We All Scream for...Sunscreen?

Sunscreen, we know we need it, but do we really know what to use and why?  When I began researching this topic I expected to gain a refresher about sun safety, discover a few advancements and present you with a brief summary.  Boy was I wrong!  The refresher part was easy, but the discovering new advancements was like opening Pandora's box.  There are some very opinionated debates about what sunscreen you should wear, how you should wear it, and why you should wear it. Sun School 101

There are two types of UV Radiation being giving off by the sun, UVA and UVB and you need protection from both.

  • UVA - These are the rays that cause AGING This is the dominant tanning ray whether tanning out doors or in a tanning bed and it is strong enough to permeate through glass and clouds.  This ray penetrates the skin deeper than a UVB ray, thus causing cumulative damage to the skin over time. 1
  • UVB - These are the rays that cause your skin to BURN as they tend to effect only the superficial epidermal layer (or the top most layer).  The intensity of these rays vary by time of day, altitude and season. 1

According to the FDA's new labeling rules for 2012, if a bottle of sunscreen just has an SPF + a number it will not block out a significant amount of UVA rays.  To be sure your sunscreen is going to block both UVA and UVB rays, the bottle has to read "Broad Spectrum" and have an SPF of 15 or higher.  Any sunscreen not labeled Broad Spectrum or with an SPF between 2-14 the product will be listed a warning  “Skin Cancer/Skin Aging Alert:  Spending time in the sun increases your risk of skin cancer and early skin aging. This product has been shown only to help prevent sunburn, not skin cancer or early skin aging.”  2

Types of Sunscreen

There are two types of sunscreen, physical blockers and chemical blockers.   Physical sunscreen, titanium dioxide or zinc oxide, sits on the skin's surface and physically blocks both the UVA and UVB rays.  A chemical sunscreen is absorbed by the skin so the sun becomes deactivated once the rays come in contact with the chemicals in the sunscreen. 3 There is much debate as to the safety of chemical sunscreens and every article and opinion you read will tell you something new.  If you have used any major brand of sunscreen at any point in your life, you've used a chemical sunscreen.  Two chemicals that seem to be least controversial are Avobenzone and Mexoryl (see here and here). 1  Oxybenzone and Retinyl Palmitate seems to be two of the more controversial (see here and here).

Application

  • Strip down, yep I said it, strip down to your birthday suit and apply sunscreen at least 30 minutes before you go outside.  Applying sunscreen in the buff will ensure your swimsuit won't get in the way and you can cover all the hard to reach areas.  There is nothing worse than thinking your skin is covered, your swimsuit unknowingly shifts one way just a little too far and you end up with a lobster red sunburn in one small line.
  • Apply 1 ounce (equal to 2 tablespoons or a shot glass full) of sunscreen to your entire body. 1
  • Reapply every 2 hours.  "Waterproof" sunscreens have been approved to last for 80 minutes, but may need to be reapplied sooner when swimming or with heavy sweating.  "Water Resistant" sunscreens have been approved to last for 40 minutes. 4
  • Don't forget to apply sunscreen to your ears (front and back), back of the neck, back of the hands and any exposed areas in your hair (like where your hair is parted - you do not want that to burn and then turn into a peeling, flaky scalp). 4

Guidelines

  • Always choose a broad spectrum sunscreen with a minimum of SPF 15. 1
  • Sunscreen can loose it's potency over time so be cautious using sunscreen that has changed color, smell or consistency. 4
  •  If you are concerned about potentially toxic chemicals avoid any sunscreens containing oxybenzone and retinyl palmitate. For a list of sunscreens without these chemicals, see here.
  • Remember this phrase from the American Cancer Society: "Slip, Slop, Slap and Wrap".  Slip on a shirt, Slop on sunscreen, Slap on a hat, and Wrap on sunglasses. 4

My Recommendation...

The two companies that I have trusted for the last few years is EltaMD and La Roche-Posay.  Unbeknownst to me they were the top two selling sunscreens of 2012 (see the list here - I cannot guarantee that the products on this list are free of some of the aforementioned chemicals.).

The sunscreen that I use almost every day...yes I don't wear it every day...is EltaMD UV Facial Broad Spectrum SPF 30+.  If I know I'm going to be stuck in side all day without being in the sun at all, I don't wear sunscreen.  This product is wonderful under make up.  It soaks right into the skin and leaves no greasy residue.  It's a constant in both my personal and professional make up kit.  This product is only found in a dermatologist office, but this link will tell you where it's sold in an office near you.

EltaMD UV Facial Broad Spectrum

La Roche-Posey is a company that I recommend for multiple products (I've used one of their face washes for years and I love it!).  Their sunscreens are some of the best on the market because of the Mexoryl SX technology.  The Anthelios SX Daily Moisturizer with Sunscreen is one of their best sellers.  This product is usually found in the dermatologists office, but in the last few years CVS has started carrying this line.  If it's not in a store near you then the products can be found on the CVS website.

Anthelios SX Daily Moisturizer

So as I told you in the beginning, what I thought was going to be a simple post was anything but.  Hopefully this gave you a refresher about information you already knew and introduced you to some new information about what's currently on the market.  I'd love to know what your favorite sunscreens are.

Removing Gel Nail Polish

I love Gel Nails, but it is a MUST that they be removed correctly. Once the gel polish starts to lift or chip, it is soooo tempting to want pick the polish off.  Should you be tempted to remove the polish improperly, you could damage your nail.

Damaged-Nail
Damaged-Nail

(See, I've already sacrificed one of my nails. Don't do this to yours. :) )

Removing Gel Nails at home is really quite simple.  There are a few items you will need:

  • Pure Acetone
  • Cotton Balls or Cotton Squares
  • Orange Stick (used to push your cuticles back)
  • 10- 2.5"x2.5" squares of Aluminum foil (I prefer heavy duty as it holds it's shape a bit tighter once the nail is wrapped, but the regular will work too.  Also, the measurements don't have to be exact, but this size works best for me.)
Nail
Nail

 Ready to remove the color.

Step-1
Step-1

 Dampen 1/2 a cotton ball or 1/2 a cotton square with acetone.  This doesn't need to be dripping with acetone, but it needs to be completely saturated.

Step-2
Step-2

Place the aluminum foil on top of the cotton covered nail.  Make sure the aluminum foil is placed so the corners are pointing north, south, east, west.  This will give you the longest area of the foil to wrap around your nail.

Step-3&4
Step-3&4

 Turn your hand over and wrap the foil around your finger.

Step-5&6
Step-5&6

Bend the top of the foil towards the back of your finger.  Turn your hand over and give the foil a small squeeze just under the cotton, about where your first knuckle is located.  This helps the foil from coming loose.

Depending upon the brand of Gel Polish the "soak" or removal time will differ.  I've been using the Sally Hansen Salon Pro Gel Polish and I usually let it soak for 4-5 minutes.  I always want to minimize the amount of time my skin comes in contact with the acetone, so that is why I start checking sooner than suggested.  To remove the foil I don't unwrap it, I just slide it off my finger.  Usually the polish starts looking something like this ...

Step-7
Step-7

There will be areas that have completely lifted so the polish is gone and then there will be some areas that are still attached to the nail.  Take the orange stick (or a just use a finger nail on your other hand, assuming it's not wrapped in foil) and GENTLY scrape away the polish. 

Step-8
Step-8

If you still have polish remaining, do not force it loose from the nail.  Just reuse the foil wrap to soak your nails again.  You might need to add a little more acetone to the cotton.

Step-9
Step-9

It may take a few times for the nail polish to completely release from the nail.  The important thing is DON'T RUSH.  You can damage and weaken your nail should the polish be removed incorrectly.

Step-10
Step-10

Ta-da! Perfectly removed polish.  Once the polished is removed wash your hands.  Moisturize your cuticles and nails (plain Vitamin E Oil works wonders) and use a heavy hand cream (L'Occitane Shea Butter Hand Cream is one of my favorites). 

Please don't hesitate to ask if you have any questions about this process!

Jamie

Sally Hansen Salon Pro Gel Polish - Product Review

  I LOVE painted nails, but I HATE chipped polish.  Because of my job, my hands are in pictures all the time so my nails need to look prefect.  Regular nail polish had never failed me ... until I had professional gel nails applied.  After having weeks with no chipping, it made regular nail polish just not worth the trouble.

When Sally Hansen released their Salon Pro Gel Polish that promised no chips for 14 days, I was intrigued.

Sally Hansen Salon Pro Gel Kit

Verdict: I love this product.  It's one of my favorite beauty finds.

Pros

There are other at home gel kits on the market, but here are my reason I prefer this one.

  • It's very easy to use and the color lasts.
  • As soon as the color is cured, your nails are done.  No smudging!!!
  • This product is sold in almost every store so it's readily available (Target, CVS, Ulta, etc.).   Budget tip-Some of these stores have 20% off coupons which are perfect for items like these.
  • It uses an LED light, which is safer for the skin, instead of a UV light to cure the polish.
  • These do not weaken my nails like I feel some of the professional gel polishes have.
  • 100% Acetone is all that's needed to remove the polish.  These must be removed properly, see how here.  *See Tips.
  • 99% Alcohol soaked wipes are what's in the packets you use before and after applying the polish. *See Tips
Nails
Nails

Cons

  • The range of colors are a bit limited.  Assuming this product does well in the market, I'm hoping they will expand the color range.
  • I've found my right hand (the dominant one) does tend to chip a bit quicker than my left hand.
  • The LED light has a preset 30 second timer to cure the polish, but each nail really needs a 60-90 second cure time.  **See Tips

Tips

*Some of the other at home gel polishes have specialty removers made only by their brand.  Sally Hansen does sell prepackaged 99% Alcohol wipes and small bottles of acetone, but if you're budget savvy just purchase the CVS or Target brand of Acetone found on the bottom shelf with the nail polish removers.  99% Alcohol is a medical grade alcohol that can some times be found in the pharmacy or can be purchased from one of the make up supply houses in larger cities (West Coast peeps - Frends, Nigel's; East Coast peeps - Alcone)

**Cure the polish for the first 30 seconds with the light shining directly on the nails.  For the next 30-60 seconds, rock the fingers/hand slightly side to side so the light will shine on the edges of the polish and fully cure.  Do this with all 3 steps.

Have you ever tried gel nails either at home or professionally applied?

Jamie